Contents
- 1 With the development of dental implantology ways, implant remedy has turn into extra reasonably priced and thus more straightforward for sufferers to simply accept, although implant surgical treatment is rather an invasive process. As well as, increasingly dentists are changing into consultants within the box of dental implantology. A lot of these components give a contribution to the flourishing of implantology and implant remedy. Within the case offered on this article, the remedy used to be in moderation deliberate with the purpose of restoring serve as and right kind occlusion to areas #13 and 15 with a bridge supported on two implants. Implant insertion
- 2 Intra-oral scan
- 3 CAD of the recovery
- 4 Take a look at-in provisional recovery
- 5 Ultimate recovery
With the development of dental implantology ways, implant remedy has turn into extra reasonably priced and thus more straightforward for sufferers to simply accept, although implant surgical treatment is rather an invasive process. As well as, increasingly dentists are changing into consultants within the box of dental implantology.
A lot of these components give a contribution to the flourishing of implantology and implant remedy. Within the case offered on this article, the remedy used to be in moderation deliberate with the purpose of restoring serve as and right kind occlusion to areas #13 and 15 with a bridge supported on two implants.
Implant insertion
Two implants (Nobel Biocare) had been inserted rather than tooth #13 and 15 (Fig. 1). The following degree of the remedy used to be carried out a couple of months later to make sure correct osseointegration. This will increase the opportunity of long-term good fortune of the remedy.
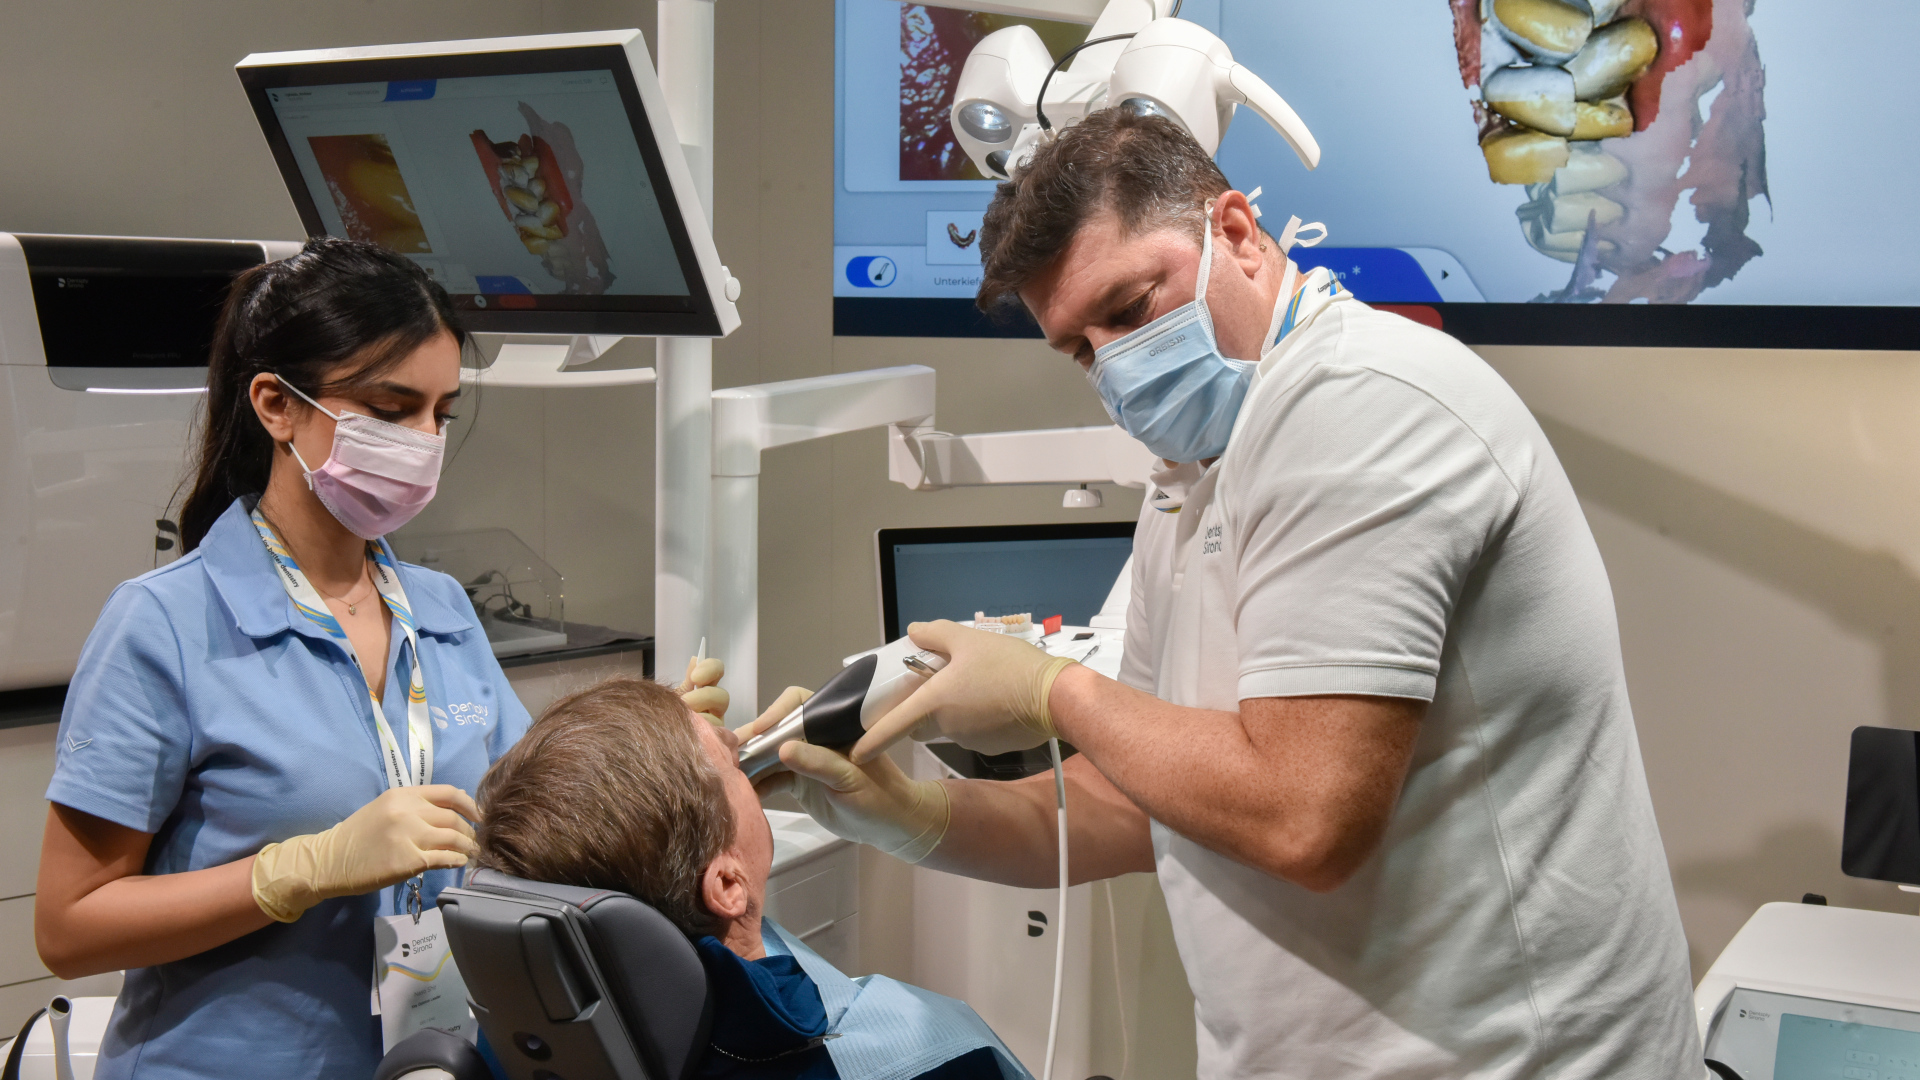
Intra-oral scan
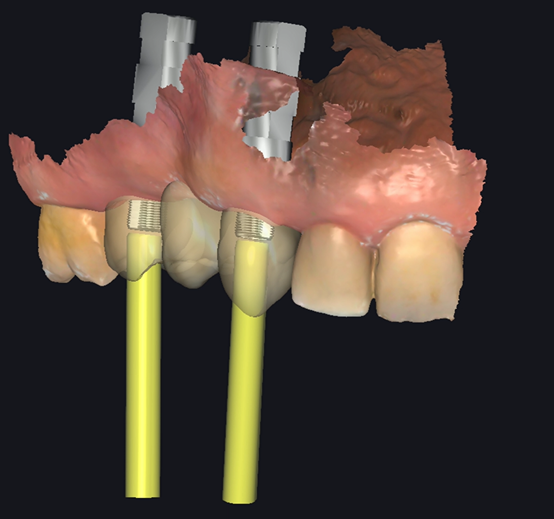
After making sure that the emergence profiles had been right kind and the cushy tissue across the implants wholesome, the intra-oral scanning used to be carried out with Aoralscan 3 (SHINING 3D) to seize the electronic impact. Step one used to be to procure full-arch information with out scan our bodies (Fig. 2), then to make a choice and delete gingival information across the implant, after which insert the scan our bodies for intra-oral scanning (Fig. 3). The final scan recorded the occlusion information (Fig. 4). Even though there used to be a steel crown on teeth #47, Aoralscan 3, using the serve as of lively scanning of steel surfaces, captured its morphology really well with out further powder spray (Fig. 5).
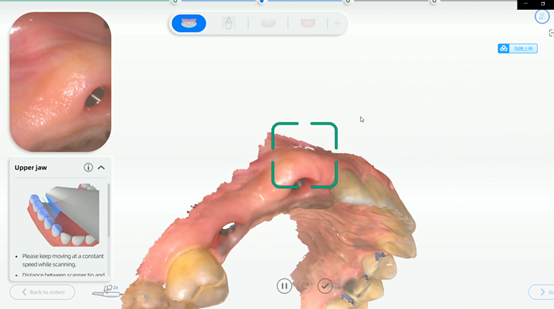
Figs. 2 & 3: Scan with out the scan our bodies hooked up.

Fig. 3
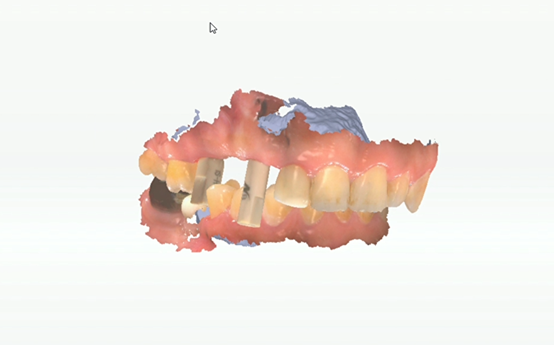
Fig. 4: Scan with the tooth in occlusion.
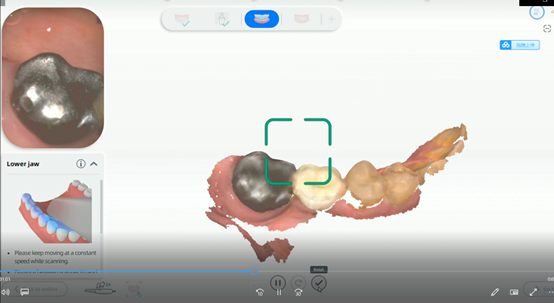
Fig. 5: Scan of the steel crown.
CAD of the recovery
The recovery used to be designed in exocad instrument (Figs. 6–8). There are lots of components to imagine when designing a prosthetic recovery, comparable to location, tension distribution of the implants, the occlusal dating and the collection of synthetic tooth the implants can beef up—usually, two implants can beef up 3 to 4 synthetic tooth.
Figs. 6–8: Design of the general recovery.
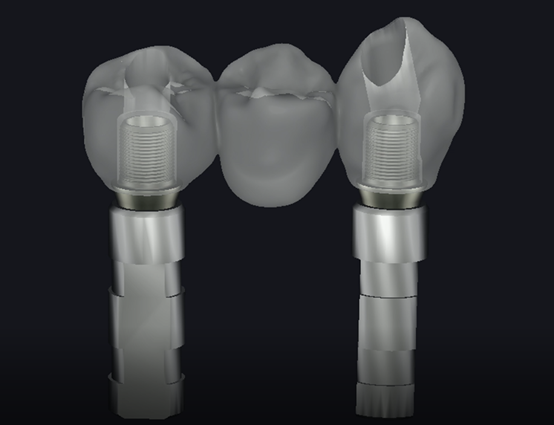
Fig. 7
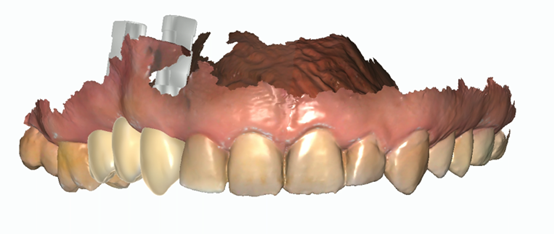
Fig. 8
Take a look at-in provisional recovery
DM12 resin (SHINING 3D) used to be used to print the type (Figs. 9 & 10) with the AccuFab-D1s printer (SHINING 3D). The published type used to be used for high quality inspection of the provisional recovery, which used to be positioned within the affected person’s mouth till the general recovery used to be in a position.
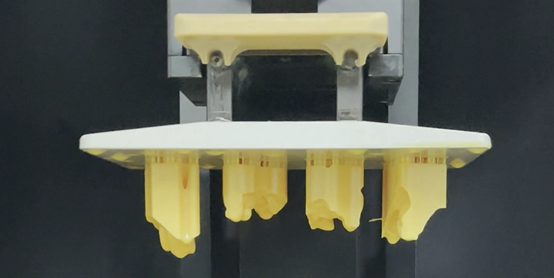
Fig. 9: 3D-printed fashions.
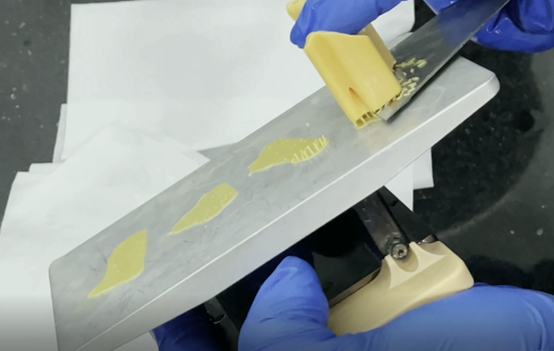
Fig. 10: Scooping the fashions off the printing platform.
Ultimate recovery
The general recovery used to be produced with monolayer zirconia. After try-in at the type (Figs. 11 & 12), the recovery used to be positioned into the affected person’s mouth. The morphology, occlusion and color of the general recovery had been gratifying, and the affected person used to be more than happy with the general consequence of the remedy (Figs. 13–15).
:sharpen(level=0):output(format=png)/up/dt/2023/03/Digital-implant-restorations-Fig-11.png "Fig. 11: Final restoration on the model, buccal view.")
Fig. 11: Ultimate recovery at the type, buccal view.
:sharpen(level=0):output(format=png)/up/dt/2023/03/Digital-implant-restorations-Fig-12.png "Fig. 12: Final restoration on the model, occlusal view.")
Fig. 12: Ultimate recovery at the type, occlusal view.
:sharpen(level=0):output(format=png)/up/dt/2023/03/Digital-implant-restorations-Fig-13.png "Fig. 13a-c: Implants with healing abutments (a). Emergence profiles, a few months after implantation (b). Final restoration in situ (c).")
Fig. 13a-c: Implants with therapeutic abutments (a). Emergence profiles, a couple of months after implantation (b). Ultimate recovery in situ (c).
:sharpen(level=0):output(format=png)/up/dt/2023/03/Digital-implant-restorations-Fig-14.png "Fig. 14: Final restoration in the patient’s mouth, left lateral view.")
Fig. 14: Ultimate recovery within the affected person’s mouth, left lateral view.
:sharpen(level=0):output(format=png)/up/dt/2023/03/Digital-implant-restorations-Fig-15.png "Fig. 15: Final restoration in the patient’s mouth, frontal view.")
Fig. 15: Ultimate recovery within the affected person’s mouth, frontal view.
Supply Via https://www.dental-tribune.com/c/shining-3d/information/digital-implant-restorations/

:sharpen(level=0):output(format=jpeg)/up/dt/2023/04/Novel-coating-material-expected-to-accelerate-bone-regeneration-for-dental-implant-procedures.jpg)
:sharpen(level=0):output(format=jpeg)/up/dt/2023/04/Osstem-Implant-2022-revenue-breaks-records-in-South-Korea.jpg)